1:1 Face Matching: How Selfie-to-ID Verification Actually Works
How face similarity APIs compare a selfie to an ID photo, what a sim_score really means, and how to set thresholds that balance fraud risk against user friction.
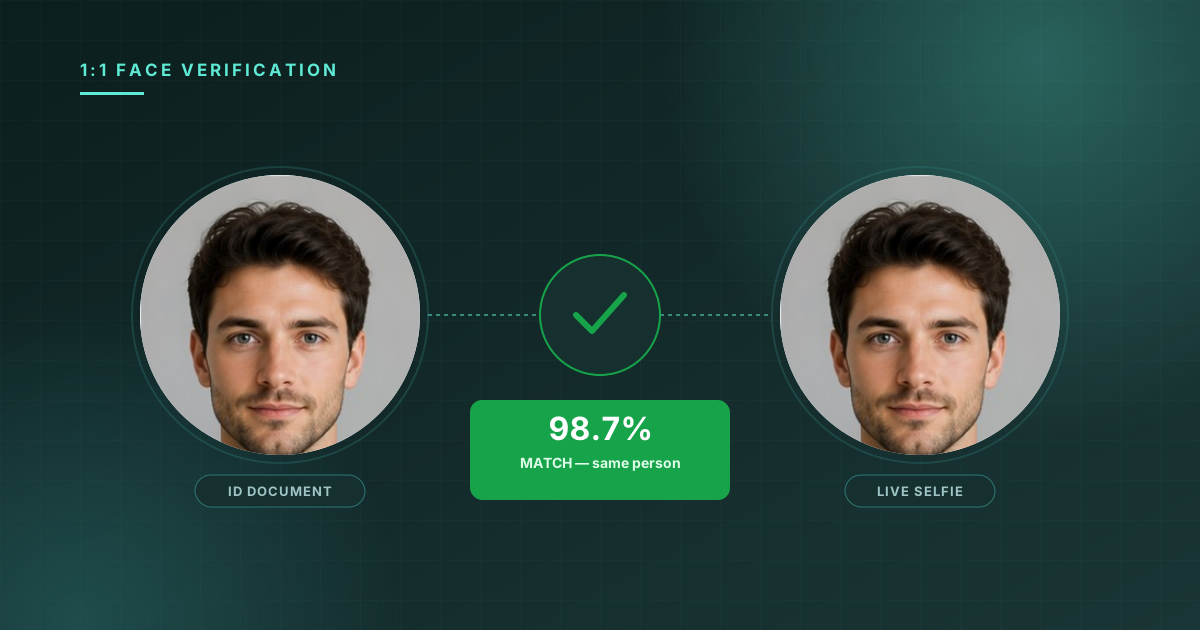
Every digital onboarding flow that asks a user to "take a selfie to verify your identity" is ultimately asking one narrow question: does the face in this selfie belong to the same person as the face on this ID document? That single 1:1 comparison — face similarity, sometimes called face verification or face matching — is one of the most widely deployed biometric checks in software, and also one of the most widely misunderstood.
This post covers what's actually happening when you call a face similarity API, what the resulting score does and doesn't tell you, and how to choose a threshold that fits your risk profile.
What "1:1" means, and why it's different from search
Face similarity is a 1:1 comparison: exactly two images go in, and a single similarity score comes out. This is distinct from 1:N face search, which compares one face against an entire gallery of candidates and returns ranked results.
The 1:1 case is simpler computationally — there's no index to search, no top-K to rank — but it's no less important. It's the check that runs every time a user:
- Verifies their identity during account creation by photographing an ID and taking a selfie
- Re-authenticates for a high-value transaction by matching a fresh selfie against the one on file
- Confirms a delivery or pickup by matching their face against a photo captured at an earlier step
Inside the comparison
A face similarity request takes two images and returns a score describing how alike the detected faces are.
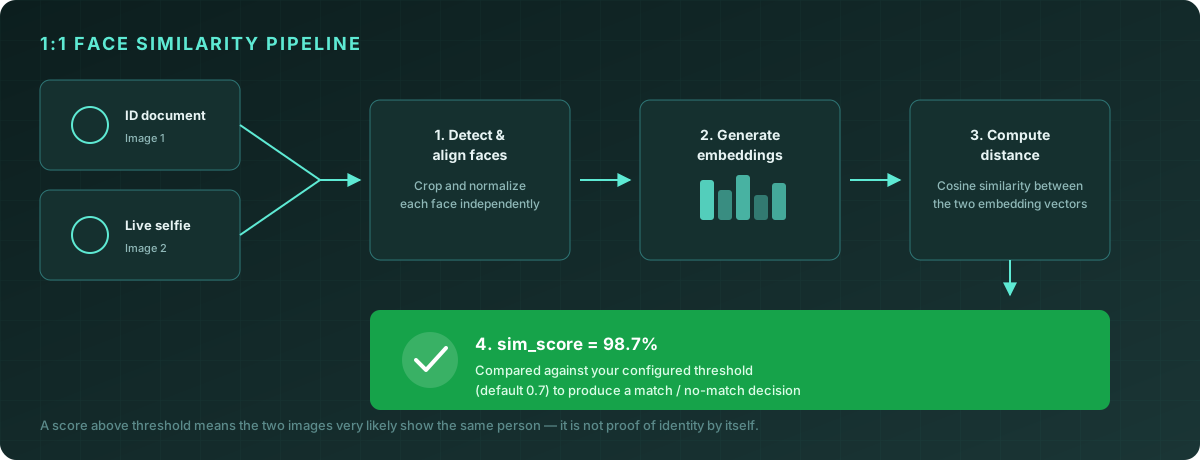
1. Detect and align faces. Each image is processed independently — the system finds the face region in image 1 and the face region in image 2, and normalizes both for pose and lighting. This step is why face similarity works even when one photo is a flat, well-lit ID scan and the other is a selfie taken at an angle in mixed lighting: the normalization happens before comparison.
2. Generate embeddings. Each cropped, aligned face is mapped to a numeric embedding vector — the same kind of representation used in 1:N face search, but here only two vectors are produced, one per image.
3. Compute distance. The system measures how close the two embedding vectors are in vector space, typically using cosine similarity. Two embeddings from photos of the same person, even taken years apart under different conditions, land close together; embeddings from different people land far apart.
4. Compare to threshold. The raw distance is converted into a 0–100 sim_score, and your application compares that score against a threshold to make a match / no-match decision.
Calling the API
const result = await client.faceSimilarity.compare({
  image1: idPhotoBuffer,
  image2: selfieBuffer,
});

console.log(result);
// {
//   success: true,
//   similarity: [
//     {
//       face_1_name: "image1",
//       face_2_name: "image2",
//       sim_score: 98.7
//     }
//   ],
//   image1_face_count: 1,
//   image2_face_count: 1,
//   threshold: 0.7,
//   processing_time_ms: 142
// }
Two response fields are easy to overlook but matter in production: image1_face_count and image2_face_count. If either is 0, there's no face to compare — your code should treat this as a distinct failure case ("we couldn't find a face in your photo, please retake it") rather than a low similarity score. If either is greater than 1, your application needs a policy for which face to use, or should reject the image and ask for a retake — comparing against the wrong face in a multi-person photo produces a meaningless score.
if (result.image1_face_count !== 1 || result.image2_face_count !== 1) {
  throw new Error("Each image must contain exactly one face");
}

const { sim_score } = result.similarity[0];
const isMatch = sim_score >= result.threshold * 100;
What sim_score actually means
sim_score is a relative measure of embedding similarity, not a probability and not a percentage of "how much the faces look alike" in a human sense. A few practical implications:
Scores cluster, they don't spread evenly. In practice, genuine matches (same person) tend to score in the 90s, and impostor pairs (different people) tend to score well below the typical threshold — often below 30. There's relatively little traffic in the middle. A score sitting right at your threshold is unusual enough that it's often worth flagging for review regardless of which side of the line it falls on.
Image quality affects scores even for genuine matches. A blurry, poorly lit, or extreme-angle selfie will produce a lower score against the same ID photo than a clear, well-lit one — for the same person. Don't interpret a borderline score as "probably not a match" without considering whether the input images themselves were low quality.
The score says nothing about liveness. A high sim_score confirms the two images depict the same face. It does not confirm that the selfie was captured from a live person in front of the camera right now — a printed photo of the legitimate user would also score highly. For identity claims about a live user, pair face similarity with liveness detection.
Choosing a threshold
The default threshold (0.7, i.e., a sim_score of 70) is a starting point, not a universal answer. The right threshold depends on what happens next:
| Use case | Suggested approach | |---|---| | High-value financial onboarding | Higher threshold (e.g., 0.85+); route borderline scores to manual review rather than auto-rejecting | | Low-risk re-authentication (e.g., unlocking a saved session) | Default threshold; a false rejection just means the user re-enters a password | | Delivery / pickup confirmation | Slightly lower threshold acceptable; consequences of a false accept are limited and often reversible | | Any flow feeding a compliance decision | Higher threshold + full audit logging of scores, not just pass/fail |
Raising the threshold reduces false accepts (an impostor matching as the legitimate user) but increases false rejects (the legitimate user failing their own check, often due to lighting, angle, or aging since the ID photo was taken). There is no threshold that eliminates both — the right value is a business decision about which error type is more costly for your specific flow, not a property of the algorithm.
Common implementation mistakes
Treating "no face detected" as a failed match. These are different failure modes with different user-facing messages. "We couldn't find a face in your photo" should prompt a retake; "the faces don't appear to match" should prompt a different remediation (re-upload ID, contact support).
Comparing against a stale or low-quality enrollment photo. If your flow re-verifies users against a selfie captured at signup months or years ago, image quality and natural appearance changes (haircuts, facial hair, aging) will gradually push genuine-match scores down. Consider periodically re-enrolling a fresh reference photo for returning users.
Logging only the pass/fail decision. Store the sim_score itself, not just whether it cleared the threshold. If you later need to tune your threshold — or investigate a disputed decision — the raw score is what makes that possible.
Assuming a match proves identity. Face similarity proves that two images show the same face. Combined with a verified ID document (via Document AI) and liveness detection, it becomes part of an identity verification claim — but on its own, it answers a narrower question.
Frequently asked questions
Can face similarity be used to compare more than two images at once? The API compares exactly two images per request. If you need to compare one face against many candidates, that's 1:N face search, a different product built for that access pattern.
Does the order of image1 and image2 matter?
No — sim_score is symmetric. Comparing A to B produces the same score as comparing B to A.
What happens if both images are of the same exact photo file? You'll get a very high score (typically 99%+, though rarely a perfect 100 due to the embedding model's own precision), since the embeddings will be nearly identical.
How does this differ from the face matching used in 1:N identification? The underlying embedding technology is the same, but the access pattern differs: face similarity is one comparison between two specified images, while face recognition searches one face against an entire gallery and returns ranked candidates.
Conclusion
Face similarity is deceptively simple from the outside — two images in, one number out — but that number encodes a real engineering pipeline (detection, alignment, embedding, distance) and requires real product decisions (thresholds, error handling, what "no face detected" means for your UX). Get those decisions right and 1:1 face matching becomes a fast, reliable building block for identity flows; get them wrong and you'll see it in support tickets long before you see it in your accuracy metrics.
The Quantilence Face Similarity API is available with 500 free requests per month. Try it on your own photos →